Mapping Guide
TrenchBroom
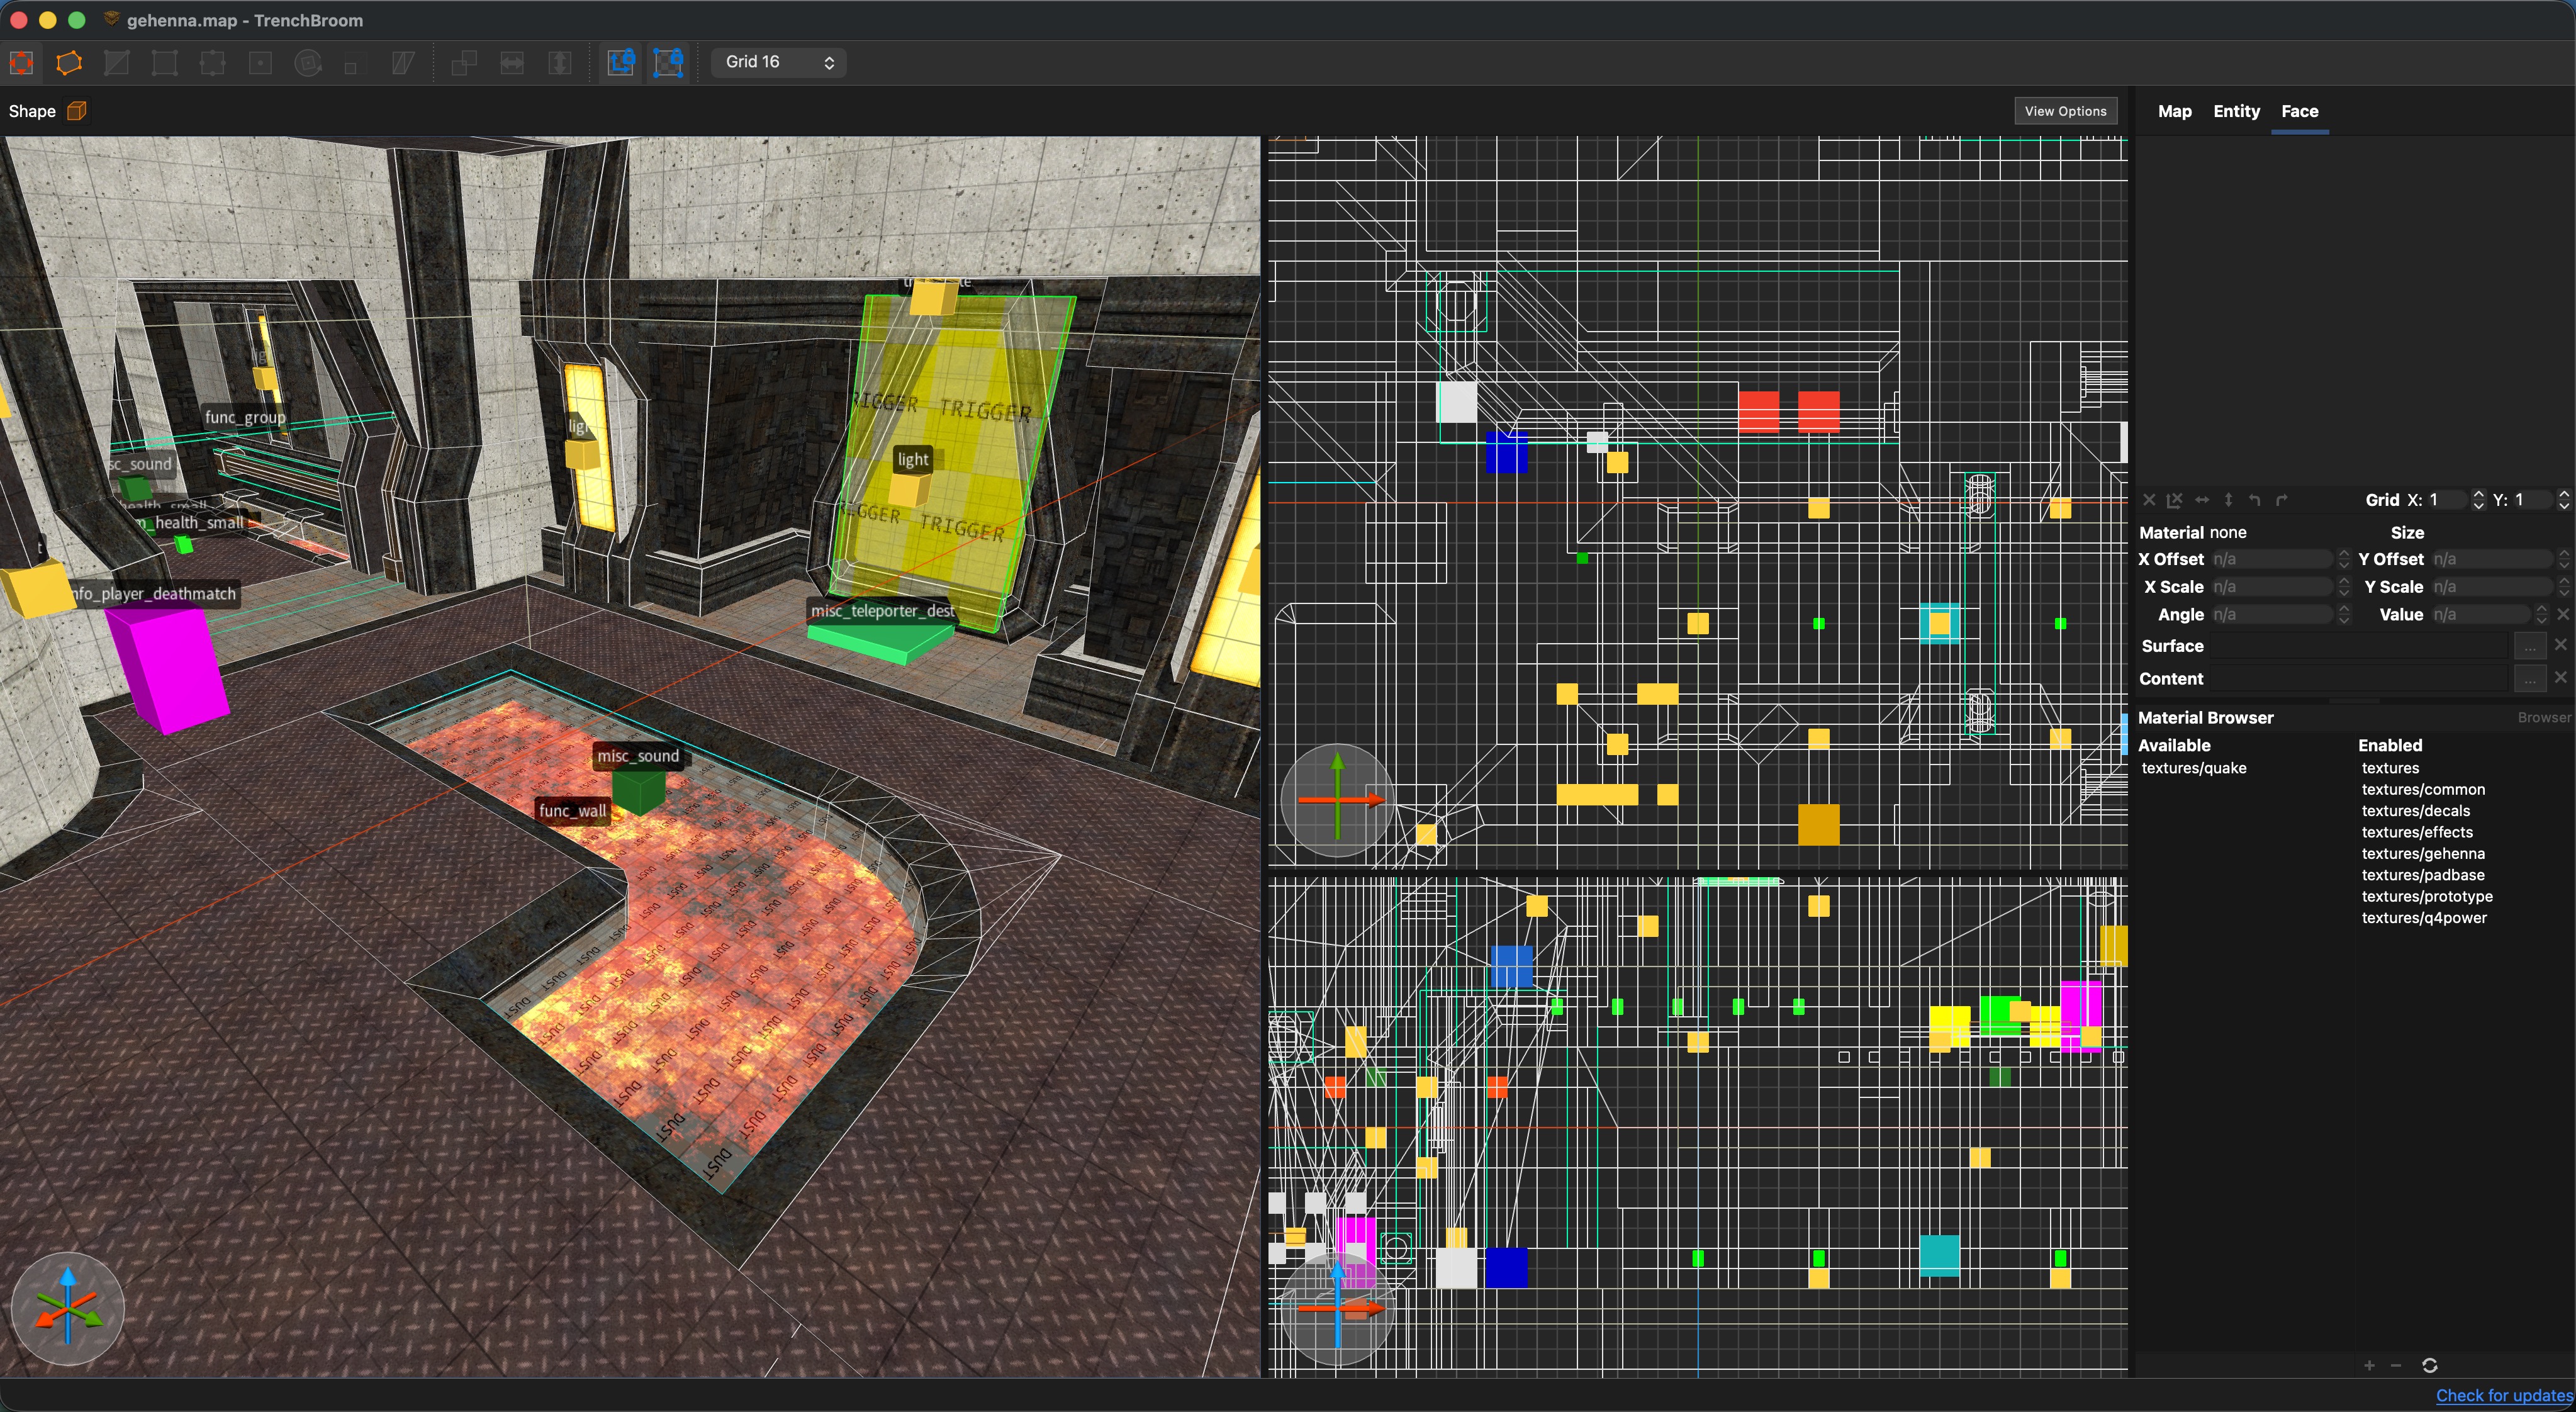
TrenchBroom is the recommended level editor for Quetoo. Quetoo ships with full TrenchBroom support: game configuration, entity definitions, and texture collections are all included, so you can open TrenchBroom, select Quetoo as the game, and start building immediately — no manual setup required.
Author your brushwork and place entities in TrenchBroom, then compile with quemap:
quemap -bsp maps/mymap.map
Quemap accepts “Quake paths”, so maps/mymap.map will work from any host directory.
Load your map in Quetoo from the console (`):
map mymap
Content Paths
Quetoo looks for custom maps, textures, sounds, and models in your platform’s user data directory:
| Platform | Path |
|---|---|
| Windows | %APPDATA%\WickedOldGames\Quetoo\default\ |
| macOS | ~/Library/Application Support/WickedOldGames/Quetoo/default/ |
| Linux | $XDG_DATA_HOME/WickedOldGames/Quetoo/default/ (usually ~/.local/share/WickedOldGames/Quetoo/default/) |
Drop your assets into the appropriate subdirectory and Quetoo will find them automatically:
| Subdirectory | Contents |
|---|---|
maps/ | Compiled map files (.bsp) and source maps (.map) |
textures/ | Custom textures and .mat material files |
sounds/ | Custom sound effects (.ogg, .wav) |
models/ | Custom entity models (.md3, .obj) |
music/ | Custom background music tracks |
For example, to test a work-in-progress map on macOS:
cp mymap.bsp ~/Library/Application\ Support/WickedOldGames/Quetoo/default/maps/
Then load it from the console:
map mymap
Tip: Package a finished map and all its custom assets into a single
.pk3for release:quemap -zip maps/mymap.bspPlayers drop the resulting
.pk3into their owndefault/directory.
Materials System
Every texture in Quetoo can have a matching .mat file that controls how it looks and behaves in the engine. A material file has the same base name as its texture and lives alongside it in the textures/ tree:
textures/mymap/wall01.jpg       ← the diffuse texture
textures/mymap/wall01.mat       ← the material definition
If no .mat file exists, the engine uses built-in defaults for all properties.
File Syntax
A material file contains exactly one material block, enclosed in curly braces. C-style // line comments and /* */ block comments are supported.
{
    // top-level properties go here

    {
        // optional stage (animated/effect layer) block
    }
}
Top-level properties define the core PBR textures and physical parameters of the surface. Stage blocks add extra rendering passes — glows, scrolling overlays, liquid warping, lens flares, etc.
Top-Level Properties
Texture maps
| Directive | Description |
|---|---|
diffusemap <path> | Base color texture. Defaults to the texture name if omitted. |
normalmap <path> | Tangent-space normal map (overrides auto-detected _norm suffix). |
specularmap <path> | Specular/gloss map (overrides auto-detected _spec suffix). |
tintmap <path> | Tint mask; R/G/B channels select independently tintable regions. |
Paths are relative to the game data root and omit the file extension, e.g. textures/mymap/wall01_norm.
PBR parameters
| Directive | Type | Description |
|---|---|---|
roughness <value> | float ≥ 0 | Spread of specular highlights. Higher = more matte. Default: 1.0. |
hardness <value> | float ≥ 0 | Sharpness of the specular lobe. Default: 1.0. |
specularity <value> | float ≥ 0 | Overall intensity of specular reflections. Default: 1.0. |
parallax <value> | float ≥ 0 | Depth of parallax occlusion mapping. 0 disables POM. Default: 1.0. |
shadow <value> | float ≥ 0 | How strongly baked shadows are applied to this surface. Default: 1.0. |
Surface behaviour
| Directive | Type | Description |
|---|---|---|
contents "<flags>" | string | Space-separated content flags that affect collision. See below. |
surface "<flags>" | string | Space-separated surface flags that affect rendering and gameplay. See below. |
alpha_test <threshold> | float 0–1 | Enable alpha-tested (cutout) transparency; fragments below the threshold are discarded. |
footsteps <name> | string | Footstep sound set to play on this surface (e.g. metal, metal2, grass). |
contents flags
| Flag | Effect |
|---|---|
solid | Blocks movement (default for world brushes). |
window | Treated as glass — solid but rendered as transparent. |
water | Water volume. Swim physics, underwater effects. |
slime | Slime volume. Hurts players. |
lava | Lava volume. Hurts players severely. |
mist | Non-solid volume (fog, thin cloth). |
detail | Detail brush; excluded from BSP vis blocking. |
ladder | Climbable surface. |
Multiple flags can be combined in a single quoted string: contents "lava detail".
surface flags
| Flag | Effect |
|---|---|
sky | Marks the brush face as a sky portal. |
slick | Reduces friction on this surface. |
blend_33 | Render at 33 % opacity. |
blend_66 | Render at 66 % opacity. |
blend_100 | Render at 100 % opacity, using the texture’s alpha channel for transparency. |
alpha_test | Enable alpha testing for cutout transparency (foliage, grates, etc). |
no_draw | Suppress visible faces. Used by caulk. |
material | Suppress visible faces, but still support material stages. |
Stage Blocks
A material can have any number of stage blocks. Each stage is an additional rendering pass drawn on top of (or instead of) the base surface. Stages are used for glows, animated textures, scrolling overlays, liquid warping, and lens flares.
{
    texture <path>                // texture for this stage (omit for flare/envmap)
    blend <src> <dest>            // OpenGL blend equation
    color <r> <g> <b> [<a>]      // constant tint (0.0–1.0 per channel)
    lighting [<intensity>]        // receive dynamic lighting
    scroll.s <speed>              // scroll texture horizontally (units/sec)
    scroll.t <speed>              // scroll texture vertically (units/sec)
    scale.s <factor>              // scale texture horizontally
    scale.t <factor>              // scale texture vertically
    rotate <hz>                   // rotate texture (revolutions/sec)
    pulse <hz>                    // pulse alpha at frequency (cycles/sec)
    stretch <amplitude> <hz>      // oscillate scale at frequency
    warp <hz> <amplitude>         // turbulent wave distortion
    anim <num_frames> <fps>       // frame animation (appends 1, 2, ... to texture name)
    flare <asset>                 // lens flare sprite (no texture needed)
    envmap <asset>                // environment-map reflection
    terrain <floor> <ceil>        // blend based on world Z height
    dirtmap <intensity>           // apply ambient occlusion dirtmap (0.0–1.0)
    shell <radius>                // render as an outward shell (item glow effect; mesh/model surfaces only)
}
Valid blend source/destination constants: GL_ONE, GL_ZERO, GL_SRC_ALPHA, GL_ONE_MINUS_SRC_ALPHA, GL_SRC_COLOR, GL_DST_COLOR, GL_ONE_MINUS_SRC_COLOR.
Examples
1. Minimal material (PBR properties only)
A simple metal floor. The diffuse map defaults to the texture name, and normal/specular maps are auto-detected from _norm/_spec suffixes, so only the PBR scalars are needed:
// textures/mymap/metal_floor.mat
{
    roughness 3.43
    hardness 3.84
    specularity 2.12
    parallax 0.75
    shadow 0.00
}
2. Material with explicit PBR maps
Override the auto-detected maps explicitly, and add a glow-layer overlay:
// textures/mymap/aqua_ceiling.mat
{
    diffusemap mymap/ceil1_aqua
    normalmap  mymap/ceil1_norm     // explicit normal map
    specularmap mymap/ceil1_spec    // explicit specular map
    roughness 1.33
    hardness 3.00
    specularity 3.50
    parallax 4.00
    shadow 0.00

    // additive glow overlay
    {
        texture mymap/ceil1_aquafx
        blend GL_SRC_ALPHA GL_ONE
    }

    // colored lens flare at the light source
    {
        color 0.00 1.00 0.67 1.00
        flare flare_2
    }
}
3. Alpha-tested transparency (chain-link fence)
// textures/mymap/chainlink.mat
{
    diffusemap mymap/chainlink
    roughness 4.00
    hardness 0.90
    specularity 1.88
    parallax 1.47
    shadow 0.00
    surface "alpha_test"        // enable cutout transparency
    alpha_test 0.400            // discard fragments below 40% alpha
}
4. Lava with animated warp and additive overlay
contents and surface flags set collision and rendering behaviour; two stage blocks add turbulent warp scrolling:
// textures/mymap/brlava.mat
{
    diffusemap mymap/brlava
    roughness 1.50
    hardness 0.70
    shadow 0.00
    contents "lava detail"     // lava volume; detail brush
    surface "liquid"           // render as a liquid surface

    // first warp pass scrolling horizontally
    {
        texture mymap/brlava1
        blend GL_SRC_ALPHA GL_ONE
        scroll.s 0.020
        warp 0.12 0.25
    }

    // second warp pass scrolling vertically (doubles up the turbulence)
    {
        texture mymap/brlava1
        blend GL_ONE GL_ONE
        scroll.t 0.020
        warp 0.12 0.25
    }
}
5. Animated texture (frame animation)
Cycles through btactmach0fx1, btactmach0fx2 at 2 fps:
// textures/mymap/btactmach0.mat
{
    diffusemap mymap/btactmach0
    roughness 2.00
    hardness 2.00
    specularity 1.50
    shadow 0.00

    {
        texture mymap/btactmach0fx1   // base frame; engine appends 1, 2, ...
        blend GL_SRC_ALPHA GL_ONE
        anim 2 0.00                   // 2 frames, 0 fps = manual/trigger-driven
    }
}
6. Scrolling conveyor belt
A diffuse overlay stage scrolls along the T axis at 0.78 units/sec:
// textures/mymap/conveyor.mat
{
    diffusemap mymap/conveyor
    roughness 3.00
    hardness 2.00
    specularity 1.70
    parallax 2.50
    footsteps metal2

    {
        texture mymap/conveyor_belt
        blend GL_SRC_ALPHA GL_ONE_MINUS_SRC_ALPHA
        scroll.t 0.780              // belt moves along T axis
        scale.s 1.000
        scale.t 1.000
    }
}
7. Non-solid mist / translucent surface
Cobweb that is visible but does not block movement or projectiles:
// textures/mymap/cobweb.mat
{
    diffusemap mymap/cobweb
    shadow 0.00
    contents "mist detail"          // non-solid volume
    surface "blend_100"             // render at full transparency (collision-only visual)
}
In-Game Editor
Quetoo includes a built-in live editor. It lets you place and modify entities and tweak material properties in real time, with instant visual feedback, without ever leaving the game.
To open the editor, set the editor cvar from the console and reload your map:
editor 1
map mymap
The editor panel appears on the right side of the screen. It has three tabs: Entities, Materials, and Mesh.
Entities
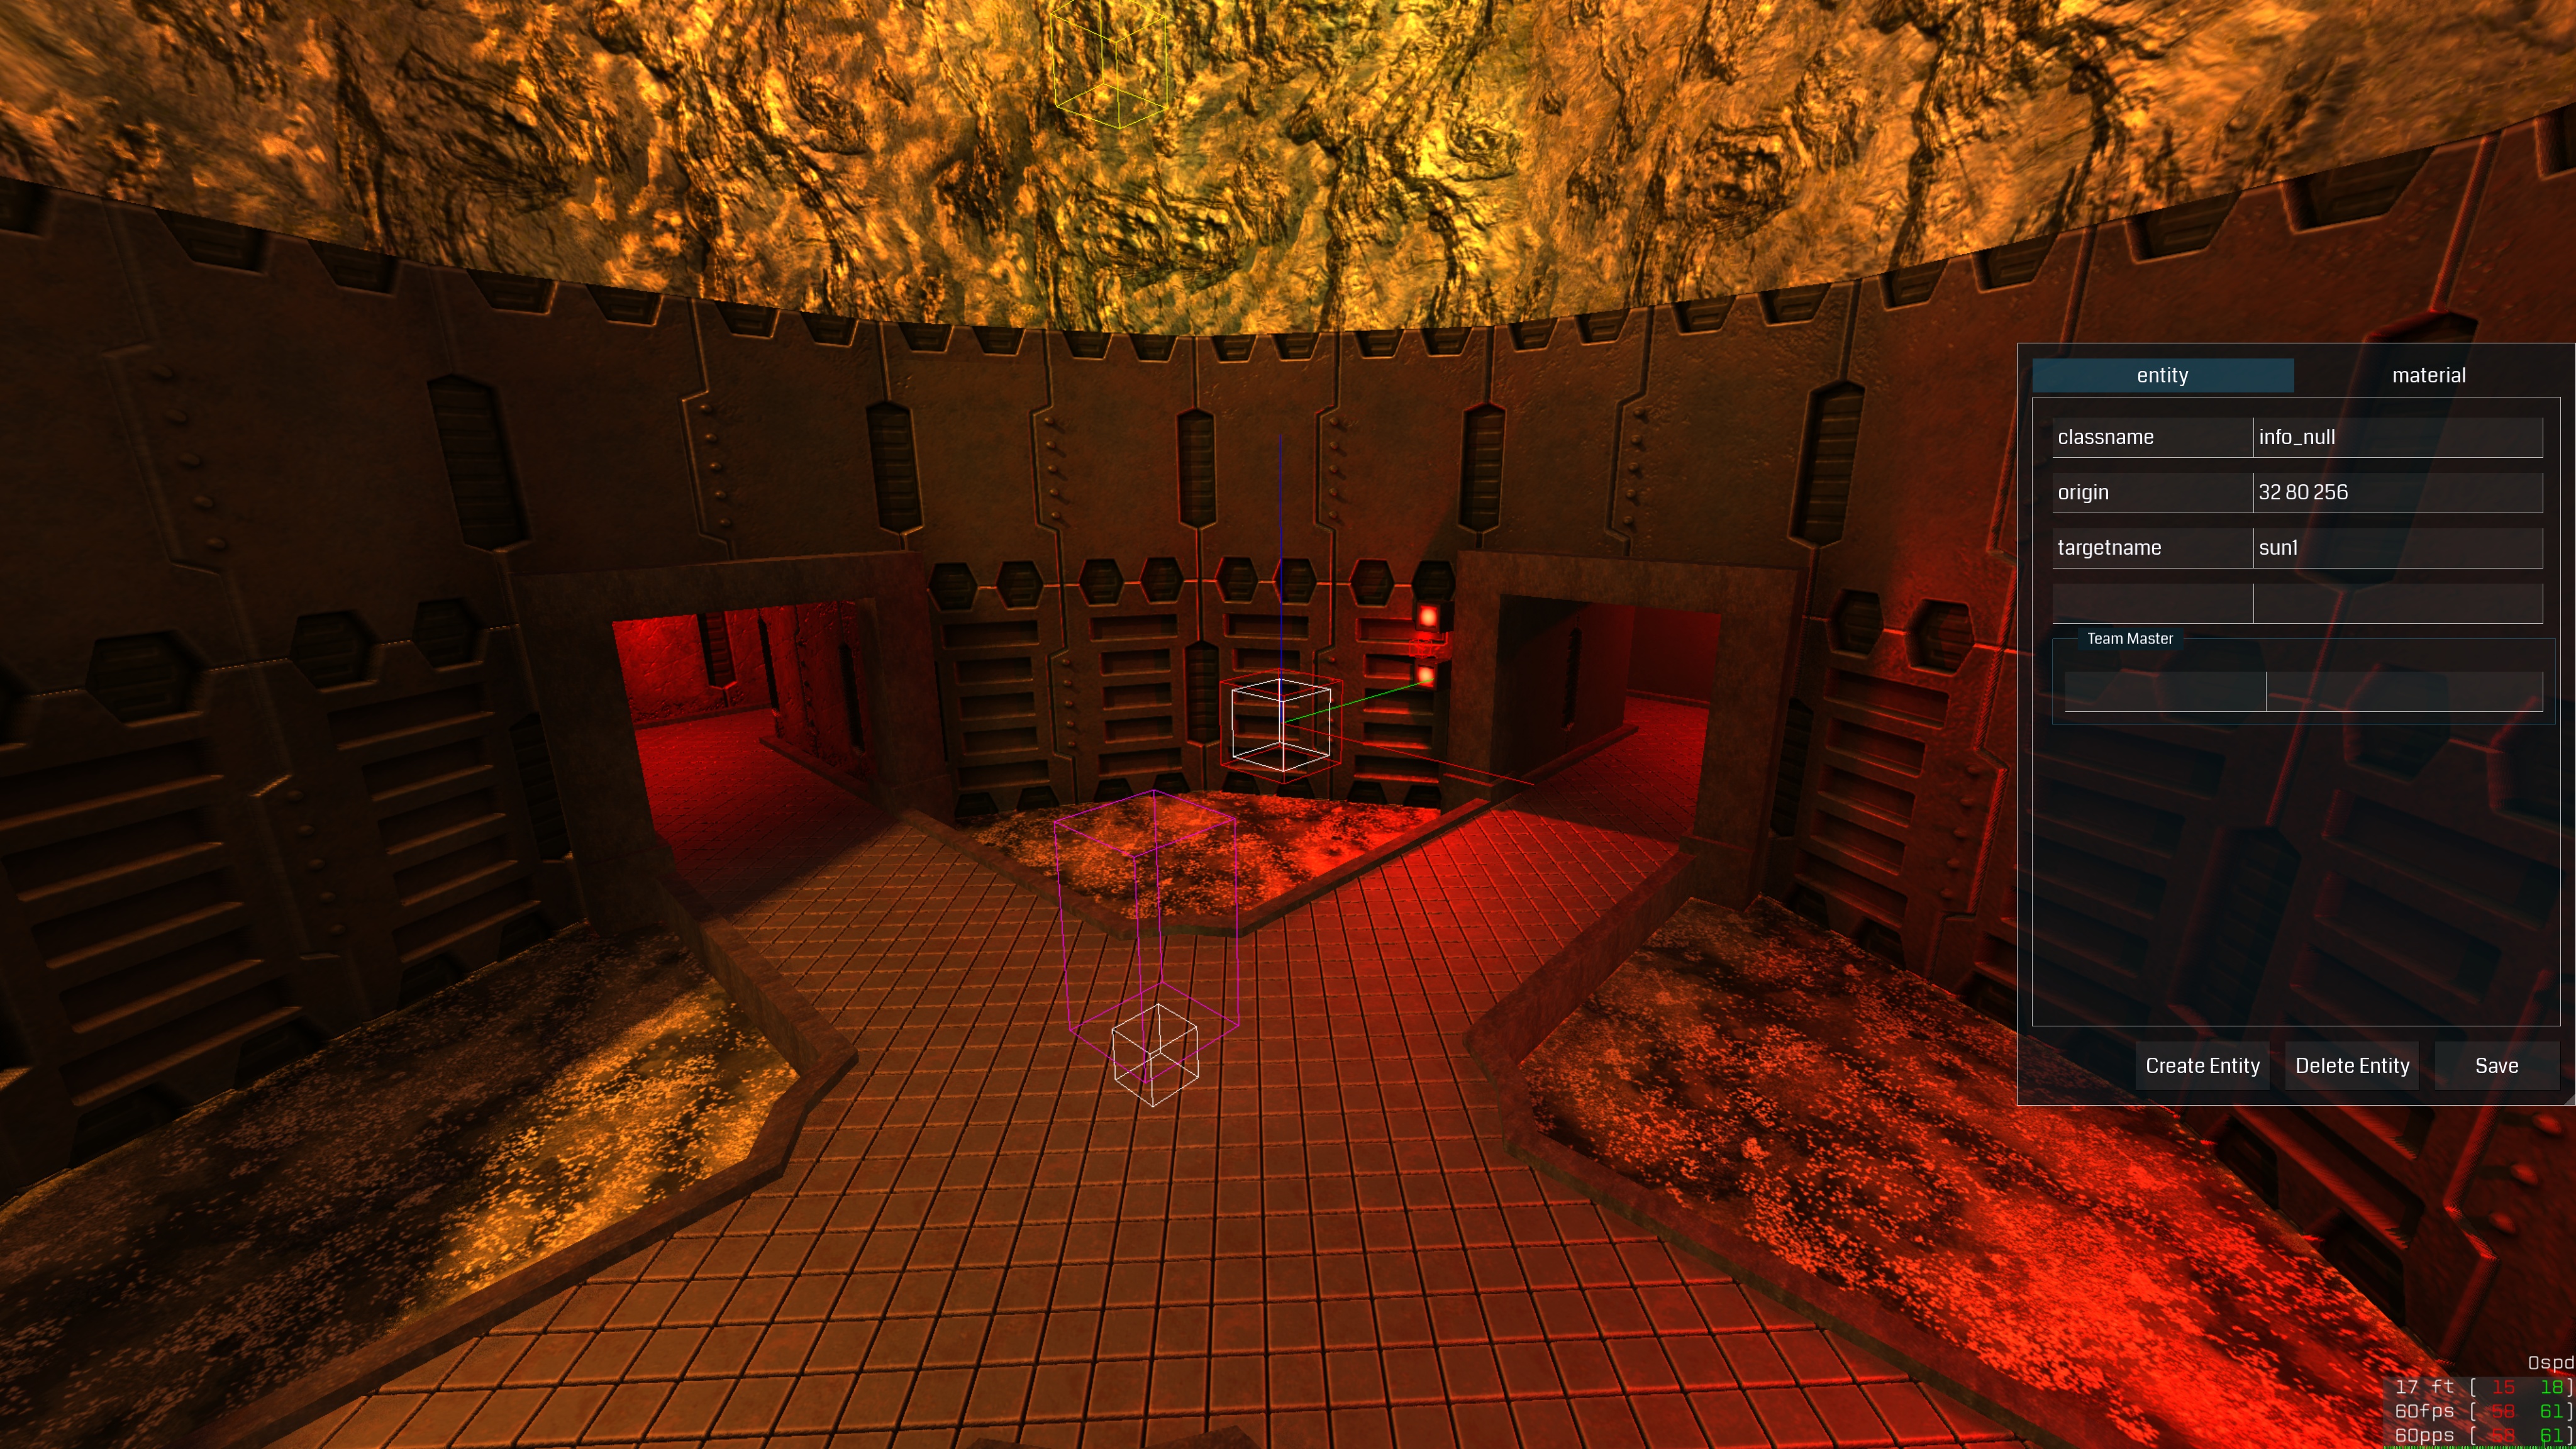
The entity editor shows all key/value pairs for the entity you are currently looking at. When you open the editor, the entity closest to your crosshair is automatically selected.
Selecting entities
Look at any entity and open the editor — the nearest entity on your line of sight is auto-selected. For lights and other point entities, look directly at the gizmo (the colored bounding box drawn in the world).
Moving entities
With the entity panel open and an entity selected, use the standard movement keys to nudge it in world space:
| Key | Action |
|---|---|
W / ↑ | Move forward |
S / ↓ | Move backward |
A / ← | Move left |
D / → | Move right |
Q / PgUp | Move up |
E / PgDn | Move down |
Movement is snapped to the grid size, which you can change with keys 1–8 (matching Radiant convention: key 1 = 1 unit, 2 = 2, 3 = 4, … 8 = 128). The default grid size is 16 units.
Windows note: If entity movement keys are unresponsive, make sure all lock keys (Caps Lock, Num Lock, Scroll Lock) are off. An SDL key-mapping quirk on Windows can cause lock keys to interfere with movement input.
Creating and deleting entities
- Create — the Create Entity button spawns a new
lightentity at your crosshair position, snapped to the grid - Delete — the Delete Entity button removes the selected entity (disabled for
worldspawn)
Copy / Cut / Paste
| Shortcut | Action |
|---|---|
Ctrl+C | Copy selected entity to clipboard |
Ctrl+X | Cut selected entity |
Ctrl+V | Paste entity at crosshair position |
Editing key/value pairs
All key/value pairs for the selected entity are shown as editable fields. Click any value field, type a new value, and press Enter — the change is applied to the live server immediately.
Saving
Click Save (or run save_editor_map from the console) to write the modified entity data back to the .map file on disk. Material changes are saved at the same time via r_save_materials.
Light Teams
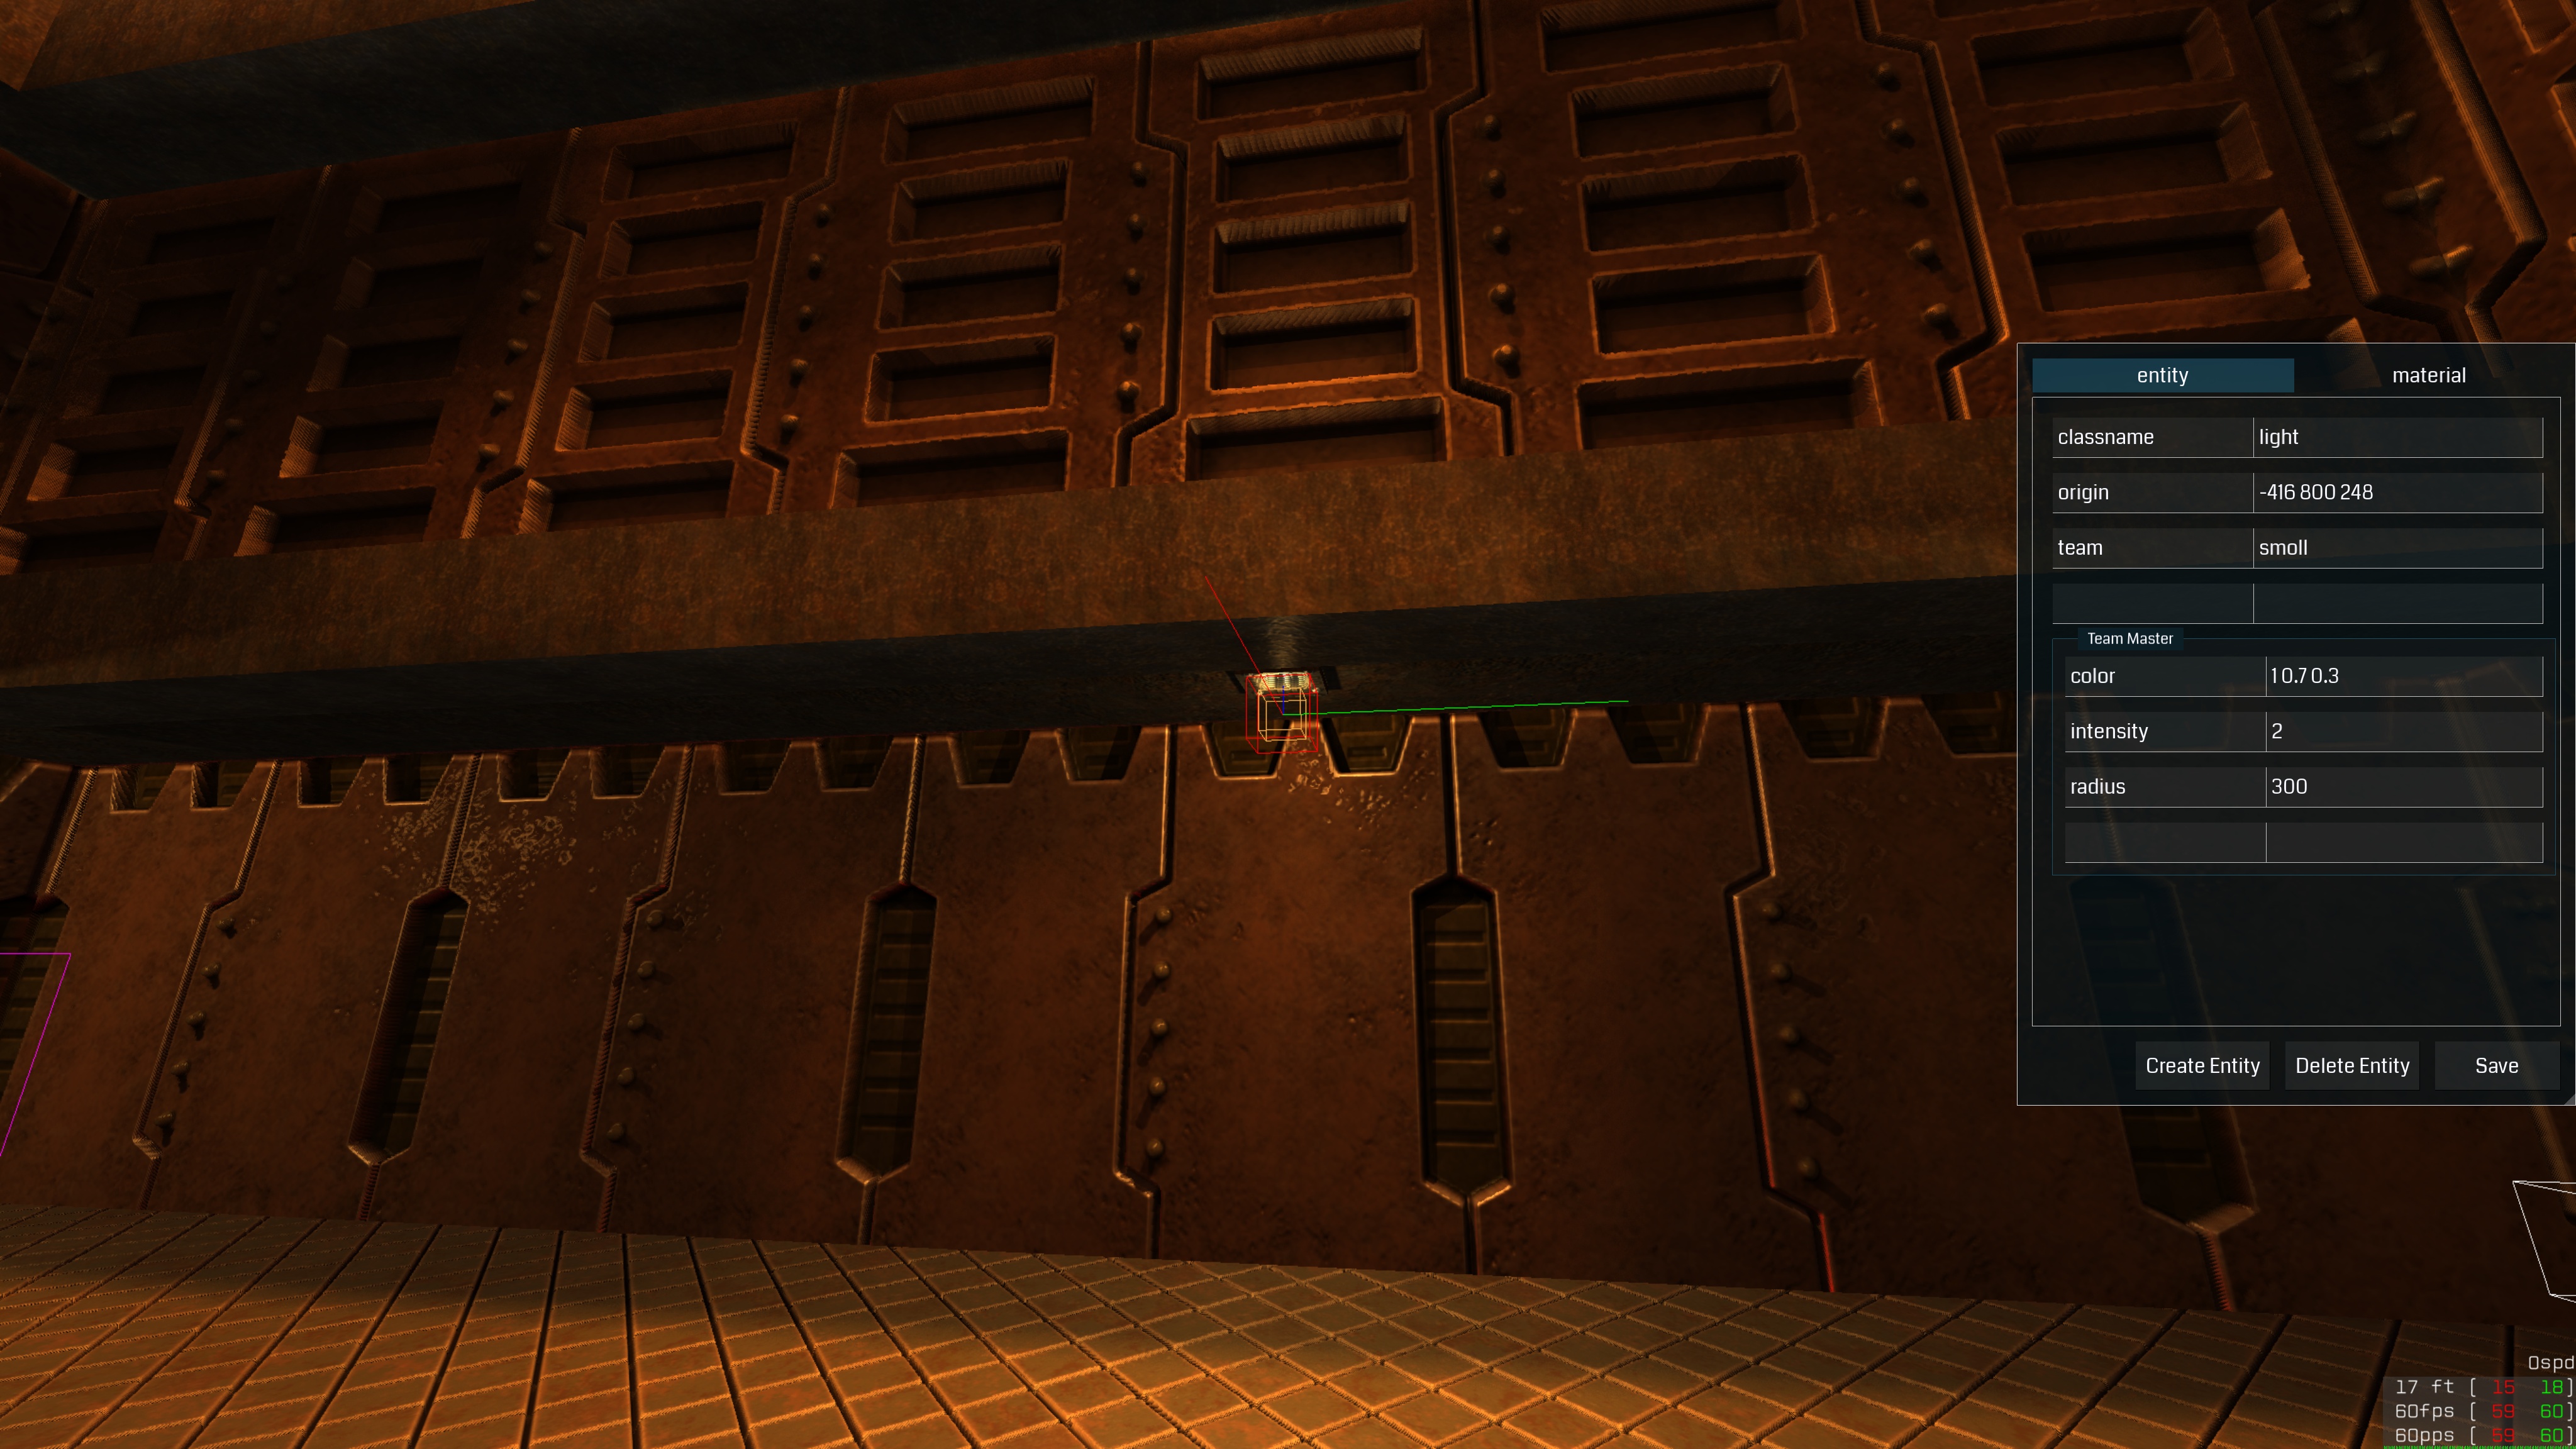
Light teams are one of the most powerful time-saving features in Quetoo’s lighting system. They let you manage a group of light entities — a row of ceiling fixtures, a ring of wall sconces, an array of runway lights — as a single unit. Set the shared properties (color, radius, intensity, animation style) once on the team master, and every light in the team inherits them automatically. Change the master in the in-game editor and all lights update live, without recompiling the map.
How teams work
Every light entity has two relevant keys:
| Key | Description |
|---|---|
team | A name that identifies the team. All lights sharing this name are in the same team. |
team_master | Set to any non-empty value on exactly one light in the team to make it the master. |
When quemap bakes lighting, each team member inherits the master’s radius, color, intensity, and style for any of those keys that the member itself leaves at their default (zero / empty). A member can override any inherited value by setting it explicitly — useful when most lights in a row are identical but one needs a different radius or tint.
Setting up a team in TrenchBroom
- Place all your lights as usual.
- On each light, set
teamto the same name — e.g.corridor_lights. - Choose one light to be the master. Set
team_masterto any non-empty value on it, e.g.1. - Set
radius,color,intensity, andstyleonly on the master. Leave them at defaults on the members. - Compile normally — the members inherit the master’s values.
// Master light — sets shared properties for the whole team
{
"classname" "light"
"origin"    "0 0 192"
"team"       "corridor_lights"
"team_master" "1"
"radius"    "320"
"color"     "1 0.9 0.7"
"intensity" "1.2"
"style"     "m"
}

// Member light — position only; everything else inherited from master
{
"classname" "light"
"origin"    "256 0 192"
"team"      "corridor_lights"
}

// Another member
{
"classname" "light"
"origin"    "512 0 192"
"team"      "corridor_lights"
}
To override a single property on one member, just add that key to the member entity. The member’s explicit value wins; everything else is still inherited from the master.
Editing teams in the in-game editor
When you select any light that belongs to a team, the in-game entity editor shows two panels:
- Top panel — the individual properties of the light you are looking at (its
originand any per-light overrides). - Bottom panel — the shared properties of the team master (
radius,color,intensity,style).
Edit the bottom panel to change all lights in the team at once. The changes take effect immediately in the rendered scene, and are written to the .map file when you click Save.
This workflow makes large-scale lighting iteration fast: run the server with quemap -bsp and quemap -light output baked in, fly around the map, tweak the master’s color or radius from the editor, save, and relight — no need to hunt down and edit dozens of individual entities.
Light styles
The style key animates a light’s intensity over time using a Quake-derived encoding: a string of characters from a (off, 0.0) to z (full brightness, 1.0), where each character represents a 100 ms step. The string loops continuously.
| Style string | Preset name |
|---|---|
m | Normal (steady) |
mmnmmommommnonmmonqnmmo | Flicker |
mmamammmmammamamaaamammma | Fluorescent flicker |
abcdefghijklmnopqrstuvwxyzyxwvutsrqponmlkjihgfedcba | Slow strong pulse |
jklmnopqrstuvwxyzyxwvutsrqponmlkj | Gentle pulse |
mmmmmaaaaammmmmaaaaaabcdefgabcdefg | Candle |
mamamamamama | Fast strobe |
aaaaaaaazzzzzzzz | Slow strobe |
mzqqmmgzzgmmgzmggzg | Flame flicker |
You can write a custom style string for any rhythm you like. Styles are especially effective on team lights: set the style once on the master, and the entire group of fixtures animates in perfect synchrony.
Materials
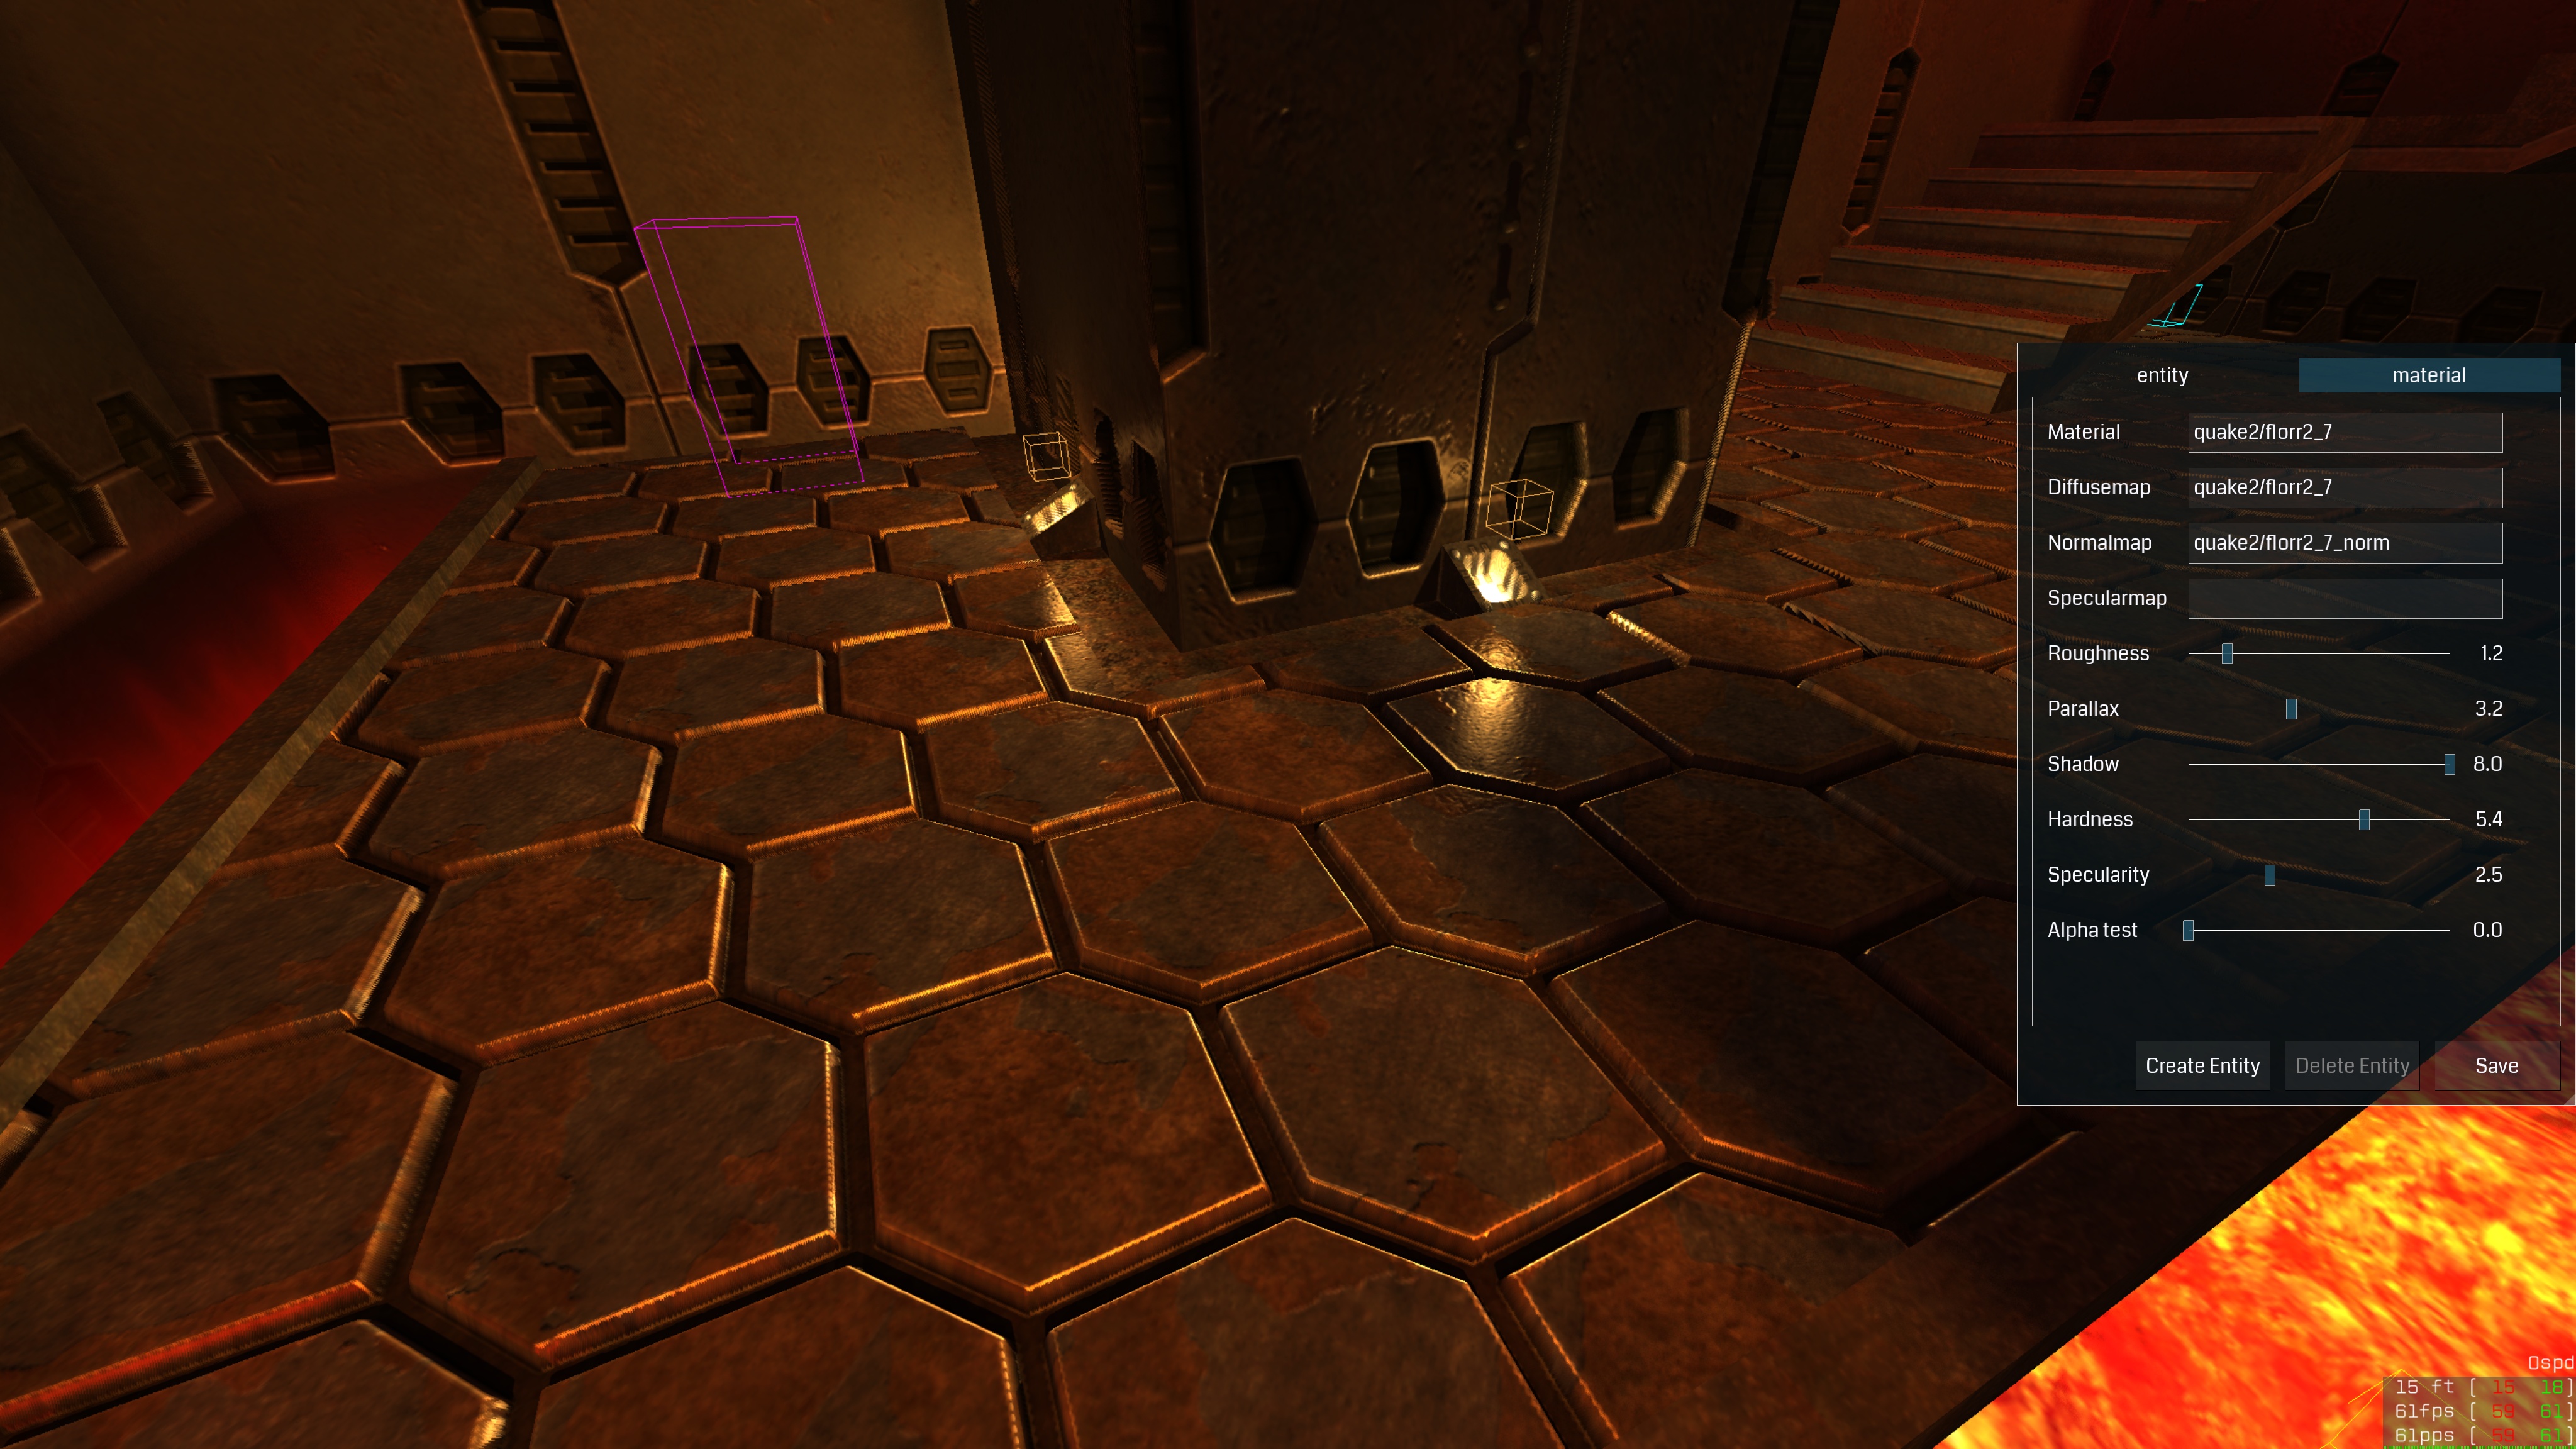
The Materials tab lets you tune surface properties of any material in the map — in real time, with instant visual feedback.
Selecting a material
Look at any surface or model and switch to the Materials tab. The material under your crosshair is loaded automatically.
Editable properties
| Property | Description |
|---|---|
| Roughness | Controls the spread of specular highlights. Higher = more matte. |
| Hardness | Sharpness of the specular lobe. |
| Specularity | Overall intensity of specular reflections. |
| Parallax | Depth of parallax occlusion mapping. |
| Shadow | Controls how much this surface receives baked shadows. |
| Alpha Test | Threshold for alpha-tested (cutout) transparency. |
All changes are reflected immediately in the renderer. The material is marked dirty and written to its .mat file when you click Save.
Key Entities
| Classname | Description |
|---|---|
worldspawn | Root entity. All solid brushes belong here. |
info_player_deathmatch | Deathmatch spawn point. Place multiple. |
info_player_team1 / info_player_team2 | Red / blue team spawns |
item_flag_team1 / item_flag_team2 | CTF flags |
light | Point light. Keys: radius, color, intensity, style, team, drift, target |
func_door | Moving door brush entity |
func_plat | Rising platform |
func_rotating | Continuously rotating brush |
misc_teleporter | Point-entity teleporter (model-less). Warps touching players to a targeted misc_teleporter_dest. |
misc_teleporter_dest | Teleport destination for misc_teleporter. |
trigger_teleport | Brush-entity teleporter trigger volume |
Items use standard Quake II classnames: item_health, weapon_railgun, ammo_slugs, item_armor_body, etc.
Further Reading
- TrenchBroom documentation
- Quetoo Discord
#mappingchannel