Documentation
This is the official Quetoo Online Manual.
About
Quetoo ("Q2") is a free first person shooter for Mac, PC and Linux, with roots steeped in the venerable Quake series. Our goal is to bring the fun of oldschool deathmatch to a new generation of gamers. We're pwning nubz, one rail slug at a time.
Features
Quetoo is much of what you would expect from a from a first-person-shooter video game. Here are some of the things that set it apart:
- Deathmatch, Capture, Instagib, and Rocket Arena gameplay modes right out of the box.
- Teams Play and Match Mode support, with Warmup and Ready functionality.
- High quality original levels and remakes of Quake series classics.
- Original sounds and game music by Roland Shaw.
- 100% free to download, play and modify. See our licensing page.
System Requirements
Base system requirements
- Windows 7, Mac OS X Lion, Recent GNU/Linux
- 1GB RAM
- 1GHz CPU
- NVidia GeForce 8500, ATI Radeon HD 3850
- Oracle Java Runtime Environment (JRE). Version 8 or above is required.
Recommended system requirements
- Windows 7, Mac OS X Sierra, Ubuntu Linux 14.04
- 4GB RAM
- 2GHz dual-core CPU
- NVidia Geforce 260, ATI Radeon HD 5850 series
- Oracle Java Runtime Environment (JRE). Version 8 or above is required.
Getting Started
Menus
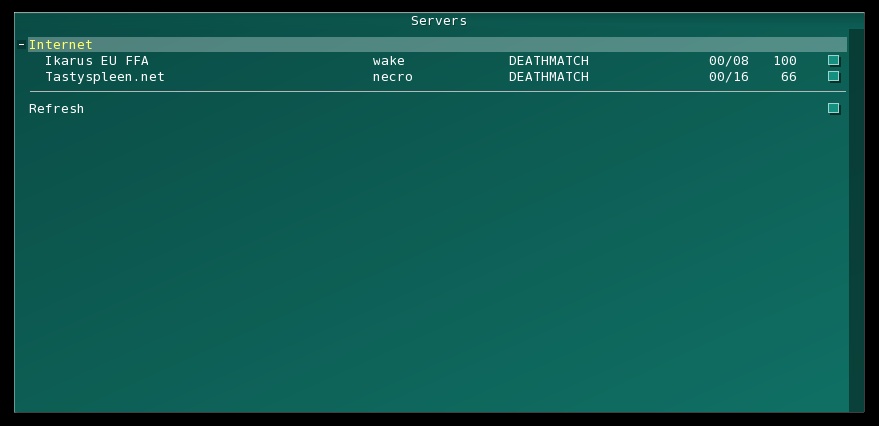
Upon starting the game, you're presented with a menu. You can use the menu system to change your video and audio settings, player profile, and controls. There is also a a server browser and server creation menu.

The console
Aside from the menus, the Quake console is the other portion of the game's user interface you'll encounter. Press the tilde (~) key to toggle the console at any point in time. There you may enter commands to configure your custom bindings, options, and See Client Configuration for more information on console commands.

Having a look
To gain your bearings, try viewing a level offline. Go to Multiplayer -> Create, select a map, and click Create.
The default controls are W, A, S, and D, and the mouse for aim.
Client Configuration
Quetoo's default settings will work fine for most players. Experienced players may wish to tweak key bindings and advanced preferences. Of course, there are a some settings that you'll need to adjust to suit your computer. Below are some of the more commonly changed client settings and commands. Type cvar_list and cmd_list at the console for a full listing.
Userinfo Variables
- skin
- Specifies player's model and skin. Defaults to "qforcer/default".
- shirt
- Controls player's shirt color. Other players will be able to see your color. Valid colors are "default" and a hexidecimal color value (For example FF00FF for purple), .. Defaults to "default".
- pants
- Controls player's pants color. Other players will be able to see your color. Valid colors are "default" and a hexidecimal color value (For example FF00FF for purple), .. Defaults to "default".
- color
- Controls player's color for rail slug, grappling hook, and blaster trails. Other players will be able to see your color. Valid colors are "default" and a hue from 0 to 360, .. Defaults to "default".
- name
- Specifies player's net handle. Defaults to your PC's username.
- msg
- Controls message level filtering of server print messages. Values from
0through3are valid. Defaults to0(unfiltered). - password
- Specifies password for protected servers. Defaults to "".
- rate
- Controls maximum bandwidth, in bytes per second, to be sent by the server. Values from
6000(0.75 kB/s) through25000(3.125 kB/s) are valid. Defaults to10000.
Remote Console Variables
- rcon_password
- Specifies password for remote console command execution. Defaults to "".
- rcon_address
- Specifies remote hostname for remote connectionless console command execution. Defaults to "".
General Variables
- cl_draw_net_graph
- Controls display of the network profile graph.
0means disabled,1means enabled. Defaults to1. - cl_draw_counters
- Controls display of the framerate and speed meters.
0means disabled,1means enabled. Defaults to1. - cl_max_fps
- Specifies maximum number of frames rendered per second. Values of
30or greater are valid. Defaults to0(unlimited).
Commands
- connect <server address>
- Connects to the specified server hostname or IP address.
- demo <demo name>
- Plays back the specified demo.
- disconnect
- Disconnects from the current server or stops playback of the current demo.
- ping <server address>
- Pings the specified server address, retrieving new server information if available.
- record <demo name>
- Begins recording the current game to the specified demo file.
- stop
- Stops recording the currently recording demo.
- quit
- Quits the game.
Server Configuration
Quetoo servers require relatively few resources in terms of CPU and RAM. However, you will likely find that bandwidth is critical. While small servers can be run over cable modems and fast DSL connections, large servers should be run from data centers witha fast connection.
General Variables
- sv_hostname
- The server name as seen by clients in the server browser. Defaults to "Quetoo".
- sv_max_clients
- The maximum number of clients allowed to connect. Values from
1to256are valid. Defaults to1for listen servers or8for dedicated servers. - sv_public
- Controls reporting to the master server. Non-public servers are not visible to Internet players. Defaults to
0. - sv_rcon_password
- The password required for remote administration. Set to a strong password to enable
rcon. Defaults to "" (disabled).
Gameplay Variables
- g_capture_limit
- Controls the score limit (captures) per-level. Defaults to
8. - g_ctf
- Controls Capture the Flag. Defaults to
0(disabled). - g_frag_limit
- Controls the score limit (frags) per-level. Defaults to
30. - g_gameplay
- The gameplay type. Valid values include "deathmatch", "duel", "instagib" and "arena". Defaults to "deathmatch".
- g_password
- The password required for players to connect. Defaults to "" (disabled).
- g_teams
- Controls Teams play. Defaults to
0(disabled). - g_time_limit
- Controls the time limit per-level, in minutes. Defaults to
20.0.
Commands
- kick <player name>
- Forcibly disconnects the specified player. The player name can also be a client slot number as reported by
status. - map <map name>
- Immediately load the specified map. All connected clients will reconnect.
- quit
- Quits the server.
- say <message>
- Issue a chat message to all connected clients.
- status
- Print status information for all connected clients.
- tell <player name message>
- Issue a chat message to the specified client. The player name can also be a client slot number as reported by
status.
Gameplay
Quetoo has multiple gameplay modes all centered around blasting your friends to bits. You'll have to frag your "enemies" and stay alive to be successful. Learn to use the map and the items available on it to your advantage. Stock up on weapons, ammo and armor like they're going out of style, and always know where the nearest health packs are.
Deathmatch / Free-For-All (FFA)
Classic deathmatch. There's many players but no teams in this gamemode, so just shoot at everything that moves and expect others to do the same. The rough idea in this mode is to frag as many opponents as possible without getting yourself killed too often. The player who reaches the fraglimit first (fraglimit setting) or the player who has most frags when the timelimit is hit (timelimit setting) is the winner.
Team Deathmatch (TDM)
Teams-based deathmatch play is a long-standing favorite of all veteran Quake players. Up to four teams occupy the map: Red, Blue, Green, and Orange. Use the banner at the bottom of your screen and the scoreboard to know which team you're on, and go after the other teams. Communication is key in this gameplay mode, so you may want to setup some say_team macros to help out. Friendly fire may or may not be enabled, so ask before your teammates become collateral damage.
Capture the Flag (CTF)
Again multiple teams fight against each other in this mode. Each team has a base that holds its flag. The idea is to steal the enemy flag and take it back to your base. You can only score a capture if your own flag is still at your base, so make sure it is defended at all times. If a flag carrier is fragged they will drop the flag. Run over it to teleport it back to your base (if it's yours) or to pick it up (if it belongs to the other team). Captures, not frags, are the goal of this gameplay mode, so taking one for the team is sometimes wise.
Rocket Arena (Arena)
In Rocket Arena mode, players spawn with full armor and most weapons and ammo (the BFG is not supplied), but that's all you get. No pickup items are available to replenish you. In addition, self-damage is disabled. This means that you can rocket jump and grenade jump and without taking damage. Use this to your advantage to out-maneuver your opponents and reign hell upon them.
Instagib
Instagib is the low-pinging-bastard (LPB) game of choice. Players spawn with only the railgun and infinite slugs. Like Rocket Arena, no pickup items are available, so don't bother looking for them. Each rail shot is an instant kill, making this a very fast-paced gamemode. Point and click your way to victory in this fast-paced, reflex-rewarding gameplay mode.
Creating Levels
Creating levels for Quetoo is not unlike creating levels for Quake 2 or Quake 3: Arena. We recommend that you use GtkRadiant 1.6.4 or later, as it includes support for Quetoo out of the box.
GtkRadiant
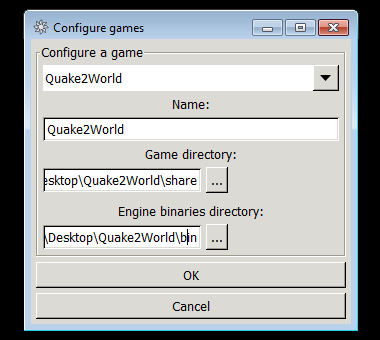
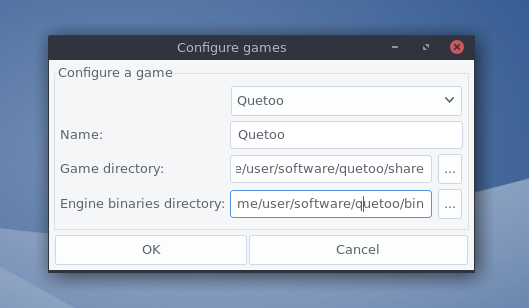
Download the latest stable release of GtkRadiant for your platform and start the application. When GtkRadiant first starts, it will prompt you to Configure Games. To configure it for Quetoo, there are two paths you must provide:
- Game directory
- More accurately, this is the game data directory. For Windows users, this is
Quetoo\share. For Mac users, it isQuetoo.app/Contents/Resources. And for GNU / Linux users, it'squetoo/share. - Engine binaries directory
- This is the path to
quetooand, more importantly,quemap. On Windows, this isQuetoo\bin. On Mac, it'sQuetoo.app/Contents/MacOS. And on Linux, it'squetoo/bin.
The dialog should look something like this:

If you run into trouble, this video tutorial walks through setting up GtkRadiant 1.6.4 to map for Quetoo on Mac OS X:
Testing the waters
If you are new to Quake 2 level editing, you should start with Game Design's Quake 2 Guide (thoughtfully archived by Panjoo), and return to this page once you've made your first simple level. Otherwise, please continue to one of the subsections below.
Textures and Texture Sources
Quetoo supports all popular image formats for world textures: TGA, PNG, JPG, and even Quake 2's WAL format. All of the textures distributed with Quetoo may be reused in other levels, provided you pass along whatever documentation comes with them. Please avoid creating levels with textures that may not be freely distributed.
Here are some sites which provide excellent quality, legally distributable textures:
- TRaK
- SimonOC.com
- Evil Lair
- Lunaran's Textures
- RAA Texture Pack
- PhilipK
- The Quake Revitalization Project
Normalmaps and Bump Mapping
Quetoo's bump mapping (per-pixel lighting) uses a combination of deluxe mapping, dot3-bump mapping, and parallax mapping. This technique requires that you provide normalmap images for your world textures. Generally speaking, you'll want to provide a normalmap image for every visible world texture appearing in your level, except for liquids like water and lava. Materials textures like animations and pulses do not require normalmaps.
The standard convention is to name your normalmaps with the _nm or _norm suffix. For example, if your texture is named torn/floor1, the corresponding normalmap image should be named torn/floor1_nm or torn/floor1_norm. For parallax mapping, include a heightmap in the alpha channel of your normalmap textures, or provide an additional heightmap image with the suffix _h, e.g. torn/floor1_h.
Creating proper normalmaps from diffuse textures can be difficult and tedious. We recommend that you elect to use textures specifically designed for this rendering technique, that should come with properly encoded normalmaps. Should you choose a texture set that does not, you might find this tutorial for creating normalmaps useful. There are several free tools available for creating and working with normalmaps:
The best way to create normalmaps is from 3D models:
Additionally, you should tune each texture's bump mapping properties via the materials system to achieve the best looking result.
Surface and Contents Flags
Several surface flags are available in Quetoo that were not previously supported by Quake 2.
- SURF_NO_DRAW
- Comparable to Quake III Arena's caulk feature; disables rendering of any face to which it is applied. Useful on backs of beams, bottoms of crates, etc.. The BSP compiler automatically assigns this flag to any surfaces textured with
common/caulk. - SURF_TRANS33 + SURF_TRANS66
- Combining the two legacy alpha blend flags causes the renderer to use the texture's alpha channel for blending. This is useful for light volumes and decals.
- SURF_ALPHATEST
- Enables OpenGL alpha-test on surfaces to which it is applied, allowing for grates, foliage, railings, fences, and other textures with "holes".
- SURF_PHONG
- Marks surfaces for Phong Interpolation (Phong Shading) during the BSP compile process. This should only be used on curved or organic geometry such as pipes, pillars, and terrain.
The Worldspawn Entity
The worldspawn entity is the core of the .map file structure. All world brushes appear within the context of the worldspawn entity. Quetoo adds several new properties to the worldspawn entity which impact everything from atmospheric weather to gameplay modes to lightmap resolution.
Runtime Variables
The following worldspawn keys are resolved at runtime, and may be overridden at the server operator's discretion via maps.lst.
- message
- The map title string, e.g.
^2S^7tress ^2F^7ractures by ^2J^7ester. Color escape sequences are supported. Avoid newline characters. - sky
- The skybox prefix, e.g.
unit1_,thundersky_, etc.. - weather
- Atmospheric weather type for the level. Valid values are none, rain, snow. You may also append fog, and optionally a fog color specified as rgb floating point numbers, e.g.
rain fog 1.0 0.9 0.8. A fourth fog component will modify the dog density, e.g.rain fog 1.0 0.9 0.8 0.7. - gravity
- The world gravity constant for the level, defaults to
800. - gameplay
- The default gameplay type for the level. One of deathmatch, instagib, or rocket arena.
- teams
- Controls teams play.
0is off,1is on, and2tries to enforce balanced teams. - ctf
- Controls capture the flag.
0is off,1is on, and2tries to enforce balanced teams. - match
- Controls match mode, where players must ready-up for a match to begin.
0is off,1is on. - frag_limit
- Specifies maximum score a player may reach before an intermission.
- round_limit
- Specifies the maximum rounds played before an intermission. Usually used in conjunction with rocket arena gameplay.
- capture_limit
- Specifies the maximum captures to transpire before an intermission. Only useful for ctf levels.
- time_limit
- Specifies maximum time, in minutes, that will transpire before an intermission.
- give
- A comma-delimited items list which each player will receive upon respawn, e.g.
rocket launcher, super shotgun.
Compile-time Variables
The following worldspawn keys are resolved at compile time, and must be set before BSP compilation.
- ambient_light
- Specifies ambient light, or the minimum global lighting value for all light samples, as an rgb color, e.g.
0.07 0.06 0.06. A small ambient factor is recommended for most levels. - brightness
- Controls light scale. This is used to uniformly brighten or darken your level.
1.0is default, all positive floating point values are valid. - contrast
- Controls light contrast. This can be used to create darker dark areas and lighter light areas. The default value is
1.0. Values significantly higher than1.0are not recommended. - lightmap_scale
- Controls lightmap resolution, which is relative to texture size. Default is
.0625(1/16). A value of0.125will produce sharper lightmaps, but will lengthen your static lighting compile times and increase the size of your BSP. For0.25scale diffuse textures, the defaultlightmap_scaleis recommended. - saturation
- Controls light saturation, or color influence. This can be used to make a level look more colorful, or more pale. The default value is
1.0. Values from0.5to3.0are most useful. - subdivide
- Controls maximum surface size for the bsp stage of the compile. Generally, the default value
1024is recommended. Lower values may reduce artifacts, while higher values may reducer_speeds. - sun_angles
- Controls sunlight direction, specified as pitch and yaw in degrees, e.g.
-80 220. - sun_color
- Controls sunlight color, specified as rgb floating point values, e.g.
1.0 0.9 0.8. - sun_light
- Controls sunlight intensity. Values from
0to255are valid,40to150typically produce best looking results.
The Emit Entity
The misc_emit entity is a client-sided entity type used to enrich your levels with non-vital information such as static models, particle torches, flickering lights, and ambient sounds. This entity is highly customizable based on several key-value pairs.
Similar to Quake 2's spawnflags key-value pair, a set of flags exists for enabling certain misc_emit features. Whenever possible, these are automatically resolved by the game engine based on the key-value pairs you have set on the entity. Still, you will sometimes need to add these values to the flags key-value pair manually.
    EMIT_LIGHT      1
    EMIT_SPARKS     2
    EMIT_STEAM      4
    EMIT_FLAME      8
    EMIT_CORONA     16
    EMIT_SOUND      32
    EMIT_MODEL      64
- flags
- A bit-masked integer value; see above. When possible, flags are automatically resolved by the game engine based on the presence of other key-value pairs described below. However, some flag values must manually be set.
- angles
- 3 positive floating point values in degrees, these provide directional information. Applicable to
EMIT_SPARKS EMIT_MODEL. - color
- 3 positive floating point values, these provide rgb color information. Applicable to
EMIT_LIGHT EMIT_CORONA. - count
- A positive integer value which provides particle count information. Applicable to
EMIT_SPARKS. Default is12. - drift
- A positive floating point value which provides some variance to event frequency. Values greater than
0.0and smaller than5.0are most useful. Applicable toEMIT_LIGHT EMIT_SPARKS EMIT_STEAM EMIT_FLAME EMIT_SOUND. Default is0.01. - hz
- A positive floating point value which provides an event frequency baseline. Applicable to
EMIT_LIGHT EMIT_SPARKS EMIT_STEAM EMIT_FLAME EMIT_SOUND. Use thedriftkey to add variance. Sane defaults are used where possible. - model
- The game path of a model file, e.g.
outpost/tree. The model must be a static mesh (i.e. not animated). It will be positioned according to the angles key. Applicable only toEMIT_MODEL, which is set when this key is present. - radius
- A single floating point value which provides radius information. Applicable to
EMIT_LIGHT EMIT_CORONA EMIT_FLAME. Defaults are1.5,12.0and1.0respectively. - sound
- The game path of a sound sample, e.g.
aghast/drip. When nohzvalue is provided to emits which have a sound key, they are treated as looped ambient sounds. Applicable only toEMIT_SOUND, which is set when this key is present. - velocity
- 3 floating point values in units, these provide directional velocity information. Applicable to
EMIT_STEAM - attenuation
- Determines the size of the area in which a given sound is heard. Default is 1. Lower values will increase the range of the sound, whereas higher values will make the sound more localized. Setting this to -1 will make a sound play globally. Applicable to
EMIT_SOUND
Examples
A torch flame, automatically accompanied by a crackling fire sound effect:
{
    // entity 1
    "classname" "misc_emit"
    "origin" "-24 512 256"
    "flags" "8"
 }
An ambient drip:
{
    // entity 2
    "classname" "misc_emit"
    "origin" "786 1284 16"
    "sound" "aghast/drip"
}
A flickering light with sparks:
{
    // entity 3
    "classname" "misc_emit"
    "origin" "-224 640 -64"
    "angles" "0 270 0"
    "flags" "3"
    "color" "1.0 0.9 0.5"
    "radius" "1.25"
    "count" "20"
    "hz" "0.25"
    "drift" "0.5"
}
A steam emitter, pointing downward and slightly north-east, and automatically accompanied by a hissing sound effect:
{
    // entity 4
    "classname" "misc_emit"
    "origin" "216 -48 512"
    "flags" "4"
    "velocity" "10 10 -40"
}
A static mesh tree:
{
    // entity 5
    "classname" "misc_emit"
    "origin" "-1024 -42 168"
    "model" "outpost/tree"
    "angles" "4 270 0"
}
Legacy Entities
The vast majority of Quetoo entities are carryovers from Quake 2. You'll notice, however, that several items have been removed, and a few new ones are available. Also, some old items have new spawnflags to alter their behavior. They are as follows:
- item_*
- All items in Quetoo (ammo, armor, weapons, ..) can be made to float in space, rather than drop to the floor upon spawning (which is the default behavior in Quake 2). Set
spawnflagsto4on any item to enable this behavior. - trigger_push
- This is the accelerator pad entity so common in Quake 3 Arena, and also fairly popular in later Quake 2 levels. Setting
spawnflagsto2for these entities will make them emit a "rising rings" effect to help them stand out. - weapon_lightning
- This is the lighting gun weapon, which Quetoo adds as a nod to classic Quake.
Lighting
Lighting levels for Quetoo is very simple; easier than lighting them for Quake II. The BSP Compiler's lighting phase performs only direct lighting, without radiosity, but also calculates light direction values for per-pixel lighting. The following guidelines generally produce the best looking levels and the shortest BSP compile times:
Use a small
ambient_lightvalue in your worldspawn entity. Values less than0.15 0.15 0.15are usually appropriate. Tune the value to reflect your sky environment color.Use
sun_angles,sun_color, andsun_lightfor levels that have sky surfaces. Even if you have a night sky, a small amount ofsun_lightgives you ambiance and atmosphere for free.Use light-emitting surfaces (
SURF_LIGHT) sparingly. Point lights are much more efficient for the BSP compiler to process, and will generally produce equal or better looking results. A proper use case forSURF_LIGHTis a long, thin strip of contiguous light sources.Place lights only where you have actual light sources. Don't drop point lights in "mid air" where there is no light source. You're better off placing point lights as close to their actual light sources as possible, and making them very strong if you need to cast light on a floor that is far away.
Keep it simple and realistic! Fewer, stronger light sources will generally look much better than numerous, weak sources. Avoid adding more than one point light for each light source. Keep the point light close to the light source brush.
The BSP Compiler
Quetoo provides its own cross-platform BSP compilation tool called quemap. The compiler is based on the original Quake 2 tools, but in addition offers the following:
- Support for large surfaces.
- High-color texture support during light stage.
- Performance optimizations, such as not subdividing or lighting sky surfaces.
- Configurable sunlight, ambient, brightness, saturation, contrast, and lightmap resolution via worldspawn entity.
- Phong Interpolation (Phong Shading) for simulating curved or organic surfaces.
- Integrated zip authoring for generating standard distribution pk3 files for your levels.
- Integrated materials file generation for getting started with the materials system.
- Cross-platform multithreading.
In addition to these things, the quemap source code is Valgrind clean. The stock tools are riddled with dangerous instructions and memory leaks.
Invoking the compiler is simple and straightforward. You should consider running it via a command prompt or shell rather than through GtkRadiant's build menu.
Standard full compile:
quemap -bsp -vis -light maps/my.map
Fast vis, extra light, two threads:
quemap -t 2 -bsp -vis -fast -light -extra maps/my.map
Materials file generation:
quemap -mat maps/my.map
Pakfile generation (produces map-my.pk3):
quemap -zip maps/my.map
Only entities, no light or vis:
quemap -bsp -onlyents maps/my.map
The Materials System
The materials system provides a flexible framework to enhance your levels with animations, light flares, environment maps, terrain blending, and other effects. If you are familiar with Quake 3 Arena's "shaders" system, you'll be right at home with materials. If you're just curious about the basics, and using the in-game materials editor, then this video will get you started:
A material is a set of directives and parameters for an individual world texture. Each texture in your level can have zero or one material definition. Materials are defined in a plain text file called materials/mymap.mat, where mymap is the name of your .bsp file. The BSP compiler can generate a default materials file for your level to get you started: q2wmap -mat maps/my.map
General Structure
Materials are comprised of a material definition, and then zero or more layers called stages. Each stage can describe one or more effect, and each effect is blended with the result of the prior stages. The basic structure of a materials file is:
{
    # Material definition
    material path/to/texture1
    parameters
    {
        # Stage definition
        texture path/to/texture2
        parameters
    }
    ...
}
Material Definition
The material definition specifies the texture name and per-pixel lighting parameters.
- normalmap path/to/normalmap
- Normalmap overriding is used to apply common normalmap textures to several materials. By default, the engine tries
${texture}_nmand${texture}_norm. Typically, this directive is omitted. However, if you have several diffuse textures that differ only in color, you can save some texture memory by specifying the same normalmap map for each of them. See normalmaps and bump mapping - glossmap path/to/glossmap
- Glossmap overriding is used to apply common glossmap textures to several materials. By default, the engine tries
${texture}_sand${texture}_gloss. Typically, this directive is omitted. However, if you have several diffuse textures that differ only in color, you can save some texture memory by specifying the same glossmap for each of them. See normalmaps and bump mapping - bump b
- Bump amplification is used to tune bump mapping effects. Higher values increase the "bumpiness" of surfaces. The
bparameter is required, and must be a positive floating point value, or0.0. The default value is1.0. - parallax p
- Parallax amplification is used to tune the depth of bump mapped surfaces. Using values higher than
1.0requires high-quality normalmaps, with properly encoded height values. Thepparameter is required, and must be a positive floating point value, or0.0. The default value is1.0. - hardness h
- Hardness is a multiplier for the specular component of bump mapped surfaces, and can be used to amplify or mute a material's reflectiveness. Organic materials benefit from lower values, while polished metals and glass benefit from higher ones. The
hparameter is required, and must be a positive floating point value, or0.0. The default value is1.0. - specular s
- Specular amplification is used to tune the specularity of bump mapped surfaces. The
sparameter is required, and must be a positive floating point value, or0.0. The default value is1.0.
It is a best practice to define all material parameters for your opaque world surfaces, as they are eligible for per-pixel lighting. Quetoo provides safe defaults when you omit these parameters, but tuning them will often benefit the appearance of your level.
{
    material evil6/stone_floor
    bump 3.0
    hardness 1.5
    parallax 1.2
    specular 3.0
}
Note that blended materials such as glass or foliage do not support per-pixel lighting, and so you may safely omit the material parameters for them.
{
    material office/glass
    {
        envmap office/glass
    }
}
Stage Definition
There are four types of stages: texture envmap lightmap flare. A stage must start with a type declaration, e.g. texture lunaran/pad1_fx, envmap 0, lightmap, flare 1, etc..
Texture Stages
Texture stages are the most versatile and complex type, and must always declare a valid texture image, e.g. texture lunaran/pad1_fx. The following listing describes the texture stage directives.
- anim frames hz
- Frame-based animations are used to animate surfaces like computer screens. The stage texture name should end in
1, e.g.lunaran/computer1, with subsequent frames following in sequence. Theframesparameter specifies the number of textures which comprise the animation. Thehzparameter specifies the frequency of the effect. Both are required, and must be a positive integer and positive floating point number respectively. - blend src dest
- The blend directive exposes OpenGL's GL_BLEND function. This is used for textures which lack an alpha channel, where additive blending is typically required. The
srcanddestparameters are GL constants, e.g.blend GL_ONE GL_SRC_ALPHA. The default blend function isGL_ONE GL_ONE_MINUS_SRC_ALPHA. - color r g b
- The color directive is used to influence the stage's default color. This directive is often used in conjunction with other directives such as pulse or stretch. The parameters
r g bare each required, and must each be floating point numbers between0.0and1.0. - pulse hz
- Pulses are used to animate surfaces like jump pads or light fixtures. The stage texture is interpolated over the base material using a sin function. The
hzparameter specifies the frequency of the effect. It is required and must be a positive floating point number. - rotate hz
- Rotation directives are used for fan blades, Yin-Yangs, and other surfaces which should appear to rotate. The
hzparameter specifies the speed of the rotation. It is required, and must be a positive floating point number. - scale.s s, scale.t t
- The scale directives are used to scale texture stages, and can be used when a stage texture is of a different resolution than the base material texture. S and T are the two texture coordinate axis. Each directive takes exactly one required parameter, which must be a positive floating point number.
- scroll.s s, scroll.t t
- The scroll directives are used to slide texture stages across the underlying base material. This is used for computer screen redraw lines, layered water surfaces, and trim lighting. S and T are the two texture coordinate axis. Each directive takes exactly one required parameter, which must be a floating point number.
- stretch amp hz
- Stretch directives are used to create continuous expanding and contracting effects. The
ampparameter specifies the scale of the stretch, whilehzspecifies the frequency. Both are required, and must be positive floating point numbers. - terrain ceil floor
- Terrain directives are used to achieve simple height-based terrain blending. The
ceilandfloorparameters specify the highest and lowest Z-axis coordinates where blending will occur. At Z coordinates less thanfloor, the base material texture will appear; at Z coordinates greater thanceil, the stage texture will appear. Linear interpolation is used to blend the two textures at Z coordinates betweenceilandfloor. Both parameters are required, and must be floating point numbers. - dirtmap intensity
- Dirtmap directives are used to add randomized, blended artifacts to primary or terrain surfaces. This can effectively create unique looking surfaces, as generally no two polygons will receive the same set of artifacts. The
intensityparameter specifies the overall amplification of the effect. It is required, and must be between0.0and1.0.
Both terrain and dirtmap stages support per-pixel lighting, thus it is possible to create bumpmapped terrain. To do this, declare your terrain stage texture with a material definition prior to the base material.
{
    material organics/grass
    ...
}
{
    material organics/dirt
    ...
    {
         texture organics/grass
         terrain 32.0 128.0
    }
}
Envmap Stages
Environment map stages are used to simulate reflections on metal, water, glass, etc. For convenience, they may be declared with numeric values to take advantage of several built-in effect textures, e.g. envmap 0. Alternatively, a unique texture can also be provided, e.g. envmap envmaps/my_envmap.
Environment map stages do not currently support any unique directives, but do support blend color scroll.s scroll.t, described above. If a color is not provided to the stage definition, Quetoo automatically uses the surface's average static lighting color to shade the environment map.
{
    material office/glass
    {
        envmap office/glass_envmap
        blend GL_SRC_ALPHA GL_ONE
        color 0.9 0.9 1.0
    }
}
Lightmap Stages
Lightmap stages are used to blend in statically computed lighting information. This is typically applied as the last drawn stage, and is useful for shading opaque or mostly opaque stages such as animations. Lightmap stages are declared by simply beginning the stage with the lightmap type name. Lightmap stages do not support any unique directives.
{
    material lunaran/computer0
    ...
    {
        anim 4 0.3
    }
    {
        lightmap
    }
}
Flare Stages
Flare stages are used to add flares (coronas) to surfaces such as light fixtures. For convenience, flare stages may reference numeric values to take advantage of several built-in effect textures, e.g. flare 1. Alternatively, a unique texture can also be provided, e.g. flare flares/my_flare.
Flare stages do not currently support any unique directives, but do support color scale.s scale.t described above. If a color is not provided to the stage definition, Quetoo automatically uses the surface's average static lighting color to shade the flare. Either of the scale.s or scale.t directives can be used to influence the size of the flare produced by this stage.
{
    material tech/small_light
    ...
    {
        flare tech/flare1
        scale.s 1.5
    }
}
More Examples
The best way to learn the materials system is to study some of the materials files that come with Quetoo. These are conveniently available in the game data repository.
Creating Models
Coming soon.
Developing and Modding
Developing or modding Quetoo requires an understanding of the C programming language (specifically C99). To modify the rendering system, you should have some OpenGL 3.3 knowledge (See also the quick reference card and docs.gl). The following pages should get you started, but should you run into trouble, come find us on Discord.
Source Code and Dependencies
The Quetoo source code is available via Github. Checkout the source code to a directory you you wish to setup as your working copy:
All platforms
mkdir ~/Coding
cd ~/Coding
git clone https://github.com/jdolan/quetoo.git
git clone https://github.com/jdolan/quetoo-data.git --depth 1
Objectively & ObjectivelyMVC
Quetoo's user interface is built using Objectively and ObjectivelyMVC. These are relatively new libraries, and packaging for your operating system is not likely available. Unless otherwise written below, you should install these libraries from source by following the instructions on their respective Github project pages.
Windows
All dependencies, including Objectively and ObjectivelyMVC, are included in the packages or alongside the compiling instructions on the next page.
GNU/Linux
Ensure you have the following dependencies:
gcc, autoconf, automake, glib2, libcurl, libsdl2, libsdl2-image, libsdl2-mixer, libtool, Objectively, ObjectivelyMVC, physfs
Ubuntu 12.04:
sudo apt-get install autoconf automake libtool libcurl4-openssl-dev \
    libphysfs-dev libsdl2-image-dev libsdl2-mixer-dev check
Fedora 18:
sudo yum -y groupinstall development
sudo yum -y install libcurl-devel libjpeg-devel physfs-devel \
    SDL2-devel SDL2_image-devel SDL2_mixer-devel zlib-devel glib2-devel check
Mac OS X
Install MacPorts by downloading the latest .dmg file from the MacPorts site. Prerequisites for MacPorts include XCode and X11, and you should have both before proceeding.
Install Autotools, glib2, libsdl2_image, libsdl2_mixer and physfs through ports:
sudo port -d selfupdate
sudo port install autoconf automake glib2 libtool libsdl2_image libsdl2_mixer physfs pkgconfig check
Compiling
With the dependencies installed, compiling Quetoo is very easy.
Windows
Create a blank folder, and inside that folder, checkout Objectively, ObjectivelyMVC and quetoo (optionally quetoo-data) into their own folders, with their respective names. The following batch file, ran inside an empty folder, will do this (leave the last one out if you don't want the data):
git clone https://github.com/jdolan/Objectively.git
git clone https://github.com/jdolan/ObjectivelyMVC.git
git clone https://github.com/jdolan/quetoo.git
git clone https://github.com/jdolan/quetoo-data.git --depth 1
After that, head to quetoo\Quetoo.vs15 and run SET_ENV.ps1. You will be prompted to enter a folder that you will store your output binaries into, such as C:\quetoo\. This is where binaries will be automatically copied to on builds, and where debuggers will be by default set up to load from.
If you are checking out the data too, you should also run MAKE_DATA_JUNCTION.ps1 which will automatically set up a junction in c:\quetoo\share\default to the quetoo-data\target\ folder.
Open quetoo_all.sln, pick your Configuration/Platform, and build!
Unix/Mac/Mingw
If you've compiled anything that uses Autotools, this will look familiar to you:
autoreconf -i
./configure [--with-tests] [--without-tools]
make -j5
sudo make install
If you also checked out the game data from Git, you may "install" it by simply creating a symlink to it:
ln -s ~/Coding/quetoo-data/target /usr/local/share/quetoo
And finally, you may run the game:
quetoo
Eclipse & Xcode
We recommend using Eclipse or Xcode for hacking on Quetoo. Project files and formatting rules for C source code are maintained in Git.
To import your working copy into Eclipse, select Import Existing Projects into Workspace from the File and Import menus, and browse to the trunk folder. Similarly, you can import the Quetoo data working copy into Eclipse as well for convenient editing of material files and other scripts.
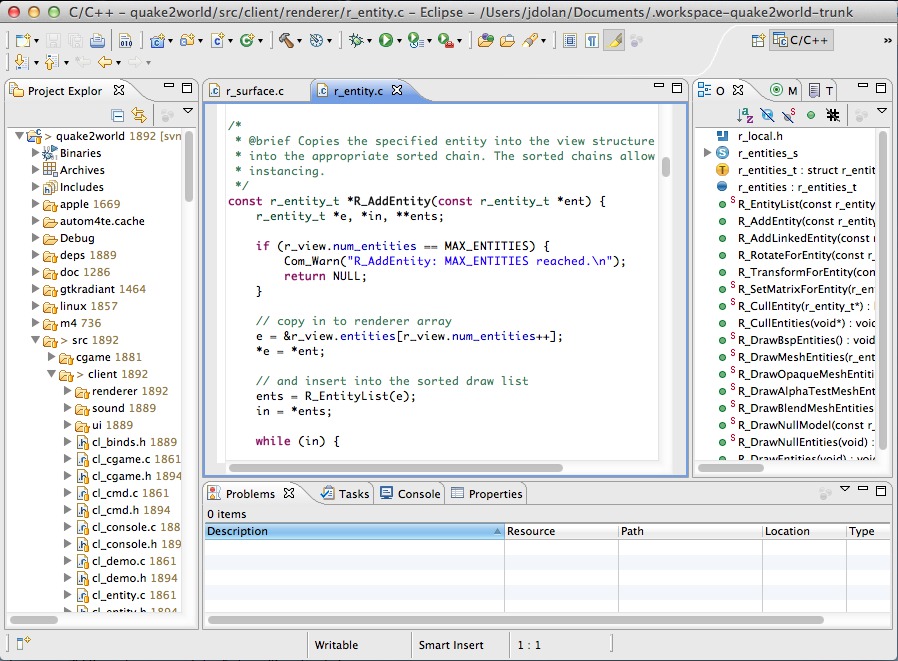
You may also wish to install the EGit team provider for Git integration, and the glshaders plugin for GLSL syntax highlighting.
Running and debugging Quetoo through Eclipse is possible and works quite well.
Debugging
For debugging Quetoo , launch the game in gdb either at the command line, or through Eclipse. Be sure that you start the game in windowed mode so that you can interact with gdb when you reach a break-point.
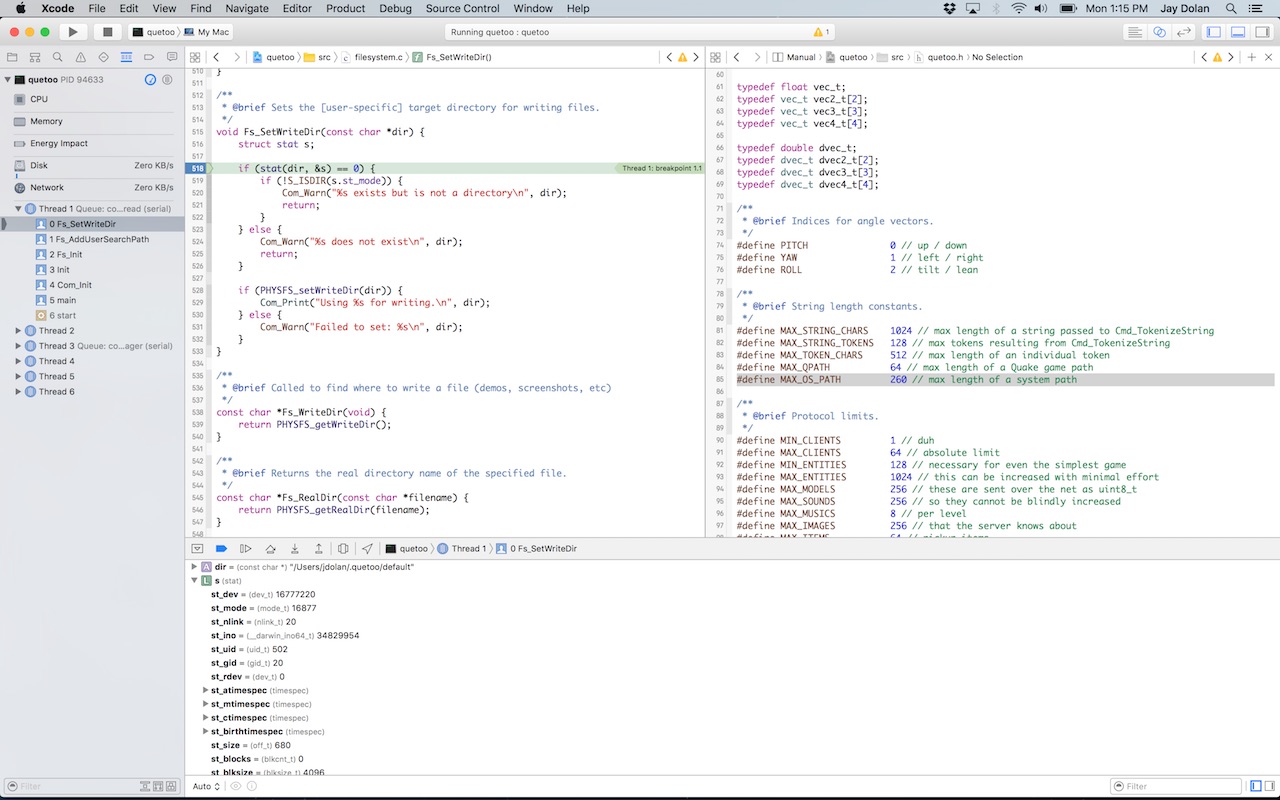
If developing on OS X, open quetoo.xcworkspace in Xcode, and run the game through Xcode. Xcode's lldb debugger works wonderfully with Quetoo. OS X will correctly make Xcode the active window when breakpoints are hit, so you can debug the game while running it in fullscreen mode.
Licensing
The Quetoo source code is licensed under the GNU General Public License Version 2.0. Artwork and media are provided under the Creative Commons Attribution-ShareAlike (CC-BY-SA) 4.0.
Support
If you haven't found what you're looking for in our online documentation, the following resources are also available:
Discord
Internet Relay Chat
- #quetoo on irc.freenode.net
Github
- Quetoo on Github
- Quetoo-data on Github
- Quake II for Mac and Linux on Github